If you’re reading this, chances are you’re staring at a compressor part that’s failed prematurely, or your entire compressor unit is acting up—and you’re not sure whether to troubleshoot the part yourself, call a technician, or even write off the whole setup. As a compressor parts supplier who’s worked with maintenance teams, plant managers, and small business owners for over a decade, I’ve seen more troubleshooting missteps than I can count. Some of those missteps lead to unnecessary part replacements (wasting thousands of dollars), others let small issues turn into catastrophic compressor failures. Today, I’m breaking down how to troubleshoot compressor parts the right way—with practical, field-tested steps that work for everything from industrial reciprocating compressors to small rotary units used in workshops. Compressor Parts

First, let’s start with the basics: before you even touch a single part, you need to rule out system-level issues that might be mimicking part failures. Too often, I get calls from customers saying their “valve plate is bad,” only to find out the real problem is a clogged air filter or a malfunctioning pressure switch. So step one: isolate the part from the rest of the compressor system. Shut off the power, bleed all pressure from the tank and lines (never work on a pressurized compressor—this is non-negotiable), and label every line and connection so you don’t mix things up when you’re putting it back together. That little label step has saved more than a few of our customers from costly rework.
Let’s use the most common problematic part as an example: the compressor valve assembly. Valves are the workhorses of any compressor—they open and close hundreds of times per minute to move air, so they wear out faster than almost any other part. The most common symptoms of a bad valve are reduced air output, overheating, or unusual knocking sounds during operation. To troubleshoot a valve, you’ll want to inspect it first for visible damage. Look for bent valve plates, broken spring retainers, or carbon buildup on the valve seats. Carbon buildup is a big one—if you’re running a compressor in a dusty environment or using oil that’s not compatible, that gunk can keep the valve from sealing properly. If you spot buildup, you can often clean the valve with a soft wire brush (avoid metal tools that can scratch the seat—scratches kill seals!) and test it for fit. If the plate still wobbles or the seat has deep grooves, it’s time for a replacement. Here’s a tip from our service team: we see way more valve failures from unregulated pressure than from normal wear. If your compressor is running at a pressure higher than its rated max, it will put twice the stress on your valves. Check your pressure regulator first before replacing a valve—nine times out of ten, that’s the root cause.
Next up: piston rings and cylinders. Piston rings are designed to create a seal between the piston and cylinder wall, preventing air from leaking back into the crankcase. When they fail, you’ll notice excessive oil consumption, air that’s moist or has a burnt smell, and a drop in compression. Troubleshooting here is a bit more hands-on, but doable if you have basic mechanical skills. First, remove the head and cylinder sleeve. Inspect the cylinder wall for scuffing, scoring, or uneven wear—if the ring marks look deeper than a sheet of paper, you’ll need to hone or replace the cylinder. For the rings themselves, check for gaps: each ring should have a specific end gap (check your compressor’s manual—for most industrial units, that’s 0.003 to 0.005 inches per inch of cylinder diameter). If the gap is wider than that, the ring has stretched from heat or wear, and it won’t seal. A common mistake here is buying cheap, generic rings off the internet. We’ve had customers come to us with “perfectly matching” rings that were made from soft metal, so they wore out in a week. Always get rings matched to your specific compressor model, not just the size.
If your compressor is a rotary screw type, the most common part issues relate to the air end and seals. Rotary screw units are quieter and more efficient than reciprocating ones, but they’re less forgiving of dirty air. If your air end is failing, you’ll see a huge spike in operating temperature (over 180°F is a red flag) and a drop in CFM (cubic feet per minute) output. To troubleshoot, first check your inlet air filter—if it’s clogged, the screw has to work harder to pull in air, which causes overheating. If the filter is clean, you’ll need to inspect the shaft seals. Shaft seals are designed to prevent oil from leaking out of the air end and air from leaking in. Signs of a bad seal are oil pooling around the base of the air end or a consistent drop in oil pressure. Another thing to watch for: the gearbox oil. If your gear oil is milky or has metal shavings in it, that’s a sign that the shaft bearings are worn out, which can damage the entire air end if left unaddressed. We always recommend checking gear oil every 500 hours for rotary screw units—preventive checks beat emergency part replacements every time.
Now, let’s talk about what to do when you’ve narrowed down the problem to a specific part, but you’re not sure if it’s actually defective. A lot of customers will order a replacement part right away, only to find the original part was fine. That’s why testing the part before replacement is critical. For electrical parts like start capacitors or pressure switches, you can use a multimeter. If your compressor won’t start, don’t assume the motor is bad—test the capacitor first. A bad capacitor will read zero or a very low microfarad rating, even if it looks fine on the outside. For pressure switches, test the voltage output at different pressure points; if it doesn’t cut on at the correct pressure (check your manual), it’s time for a replacement. For mechanical parts like valve plates or pistons, do a fit test: the valve plate should sit flat against the seat, with no gaps when you press it down. If it rocks, it’s warped.
Another common troubleshooting scenario: parts that seem fine, but the compressor still isn’t working. This is almost always due to improper installation. I’ve seen customers install a new valve plate with the exhaust and intake ports reversed, which cuts air output by 50%. Or they’ll overtighten the cylinder head bolts, which warps the valve plate. The key here is to follow the manufacturer’s torque specifications to the letter. Most of our customers who have installation issues skip the torque step because they think “snug is good enough,” but that’s a mistake. We include a full installation guide with every part we send, and it’s the section we get the most feedback on—people say it saved them hours of rework.
Now, let’s cover some tips for avoiding common part problems in the first place, because troubleshooting is half preventing issues before they start. First, stick to OEM or high-quality aftermarket parts, not cheap knockoffs. I’m not saying aftermarket parts are bad—we sell aftermarket parts that meet or exceed OEM specs, and that’s what most of our customers prefer. But buying a $10 valve plate from a random online supplier will always end up costing you more in the long run. Second, change your oil and filters on schedule. Dirty oil is the number one cause of piston ring and bearing failure, and clogged filters are the number one cause of valve and air end issues. Third, keep your compressor in a clean, dry environment. Dust, moisture, and extreme temperatures will wear out parts much faster than normal operation. If you have to run a compressor in a dusty workshop, add a secondary inlet filter to catch more debris.
When you do need to replace a part, there are a few things to keep in mind to make sure it’s the right fit. First, get your compressor’s model and serial number—this is the single most important piece of information you can give us (or any supplier). A lot of people just say “I need a valve for a 5HP compressor,” but there are five different 5HP reciprocating compressors on the market, each with a different valve. Giving us the serial number ensures you get the exact part that’s designed for your unit, not a generic one. Second, if you’re replacing multiple parts at once, it’s often smarter to do a full set rather than just the one that failed. For example, if your piston rings are worn, the cylinder and bearings are probably not far behind. Replacing all related parts at the same time avoids having to take the compressor apart again a month later when the next part fails. This is a trick I learned early on: I used to recommend replacing just the faulty part, but now I tell customers to look at the whole system. It saves them 20-30% over time, and reduces downtime, which is worth its weight in gold for any business that relies on compressed air.
Let’s wrap up with a real example to put this all together. Last year, a customer from a woodworking shop called us panicking: their 7HP reciprocating compressor was only putting out half the CFM it should, and the motor was overheating. They’d already replaced the air filter and pressure switch, and had a technician come out who said they needed a new motor. When they told us the serial number, we asked a few more questions: were they using regular motor oil in the compressor? (They said yes.) Had they checked the valve plates? (They said the technician didn’t, he just checked the motor.) We walked them through the steps: shut off power, bleed pressure, remove the head. They found the valve plates were covered in wood dust and resin buildup, which was keeping them from sealing. They cleaned the valves, replaced the air filter, and adjusted the pressure regulator to the correct rating. The compressor worked like new, and they didn’t need a $1,500 motor. That’s why taking the time to troubleshoot the part properly, instead of jumping to a replacement, makes such a big difference.
At the end of the day, compressor part troubleshooting is about being systematic, not guesswork. You don’t need to be a certified technician to do most of this—you just need to take it step by step, rule out system issues first, test parts before replacing them, and make sure every part you use is the right fit. If you’re stuck, or you’re not sure whether a part is defective, don’t hesitate to reach out for guidance. We’re a supplier that’s here to help, not just sell parts—we’ve got over a decade of experience troubleshooting compressor issues across all types of units, and we can walk you through every step of the process. Whether you’re dealing with a minor valve leak or a major air end failure, we’ll help you get the right part, the right installation, and your compressor back up and running as quickly as possible.
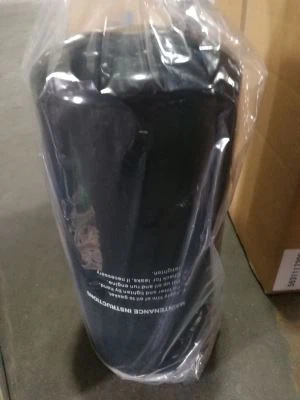
When you’re ready to take the next step, feel free to connect with our team to discuss your compressor part needs and troubleshoot any issues you’re facing. We’re here to make sure you get the right solutions for your equipment, no hidden fees or hassle.
Two Stage PM Srew Air Compressor References
- Compressed Air Gas Association. (2021). Troubleshooting Guide for Reciprocating Compressor Components.
- Rotary screw compressor maintenance manual. (2022). American Society of Mechanical Engineers.
- Industrial compressor part durability standards. (2020). International Organization for Standardization.
Xiamen HighQ Compressor Co., Ltd.
With over 20 years’ experience, Xiamen HighQ Compressor Co., Ltd. is one of the most professional compressor parts manufacturers and suppliers in China. We warmly welcome you to buy high quality compressor parts made in China from our factory. Good service and punctual delivery are available.
Address: 7th F. No.704 Yi Hua Center Xiamen China 361100
E-mail: vincent@hqcompressor.com
WebSite: https://www.hqcompressor.com/
